Christmas Red Velvet cheesecake is rich, creamy, and strikingly festive with its ruby layers and snowy frosting. Each bite brings a tangy-sweet mix of cheesecake and moist red velvet cake. Perfect for holiday tables, it looks as magical as it tastes.
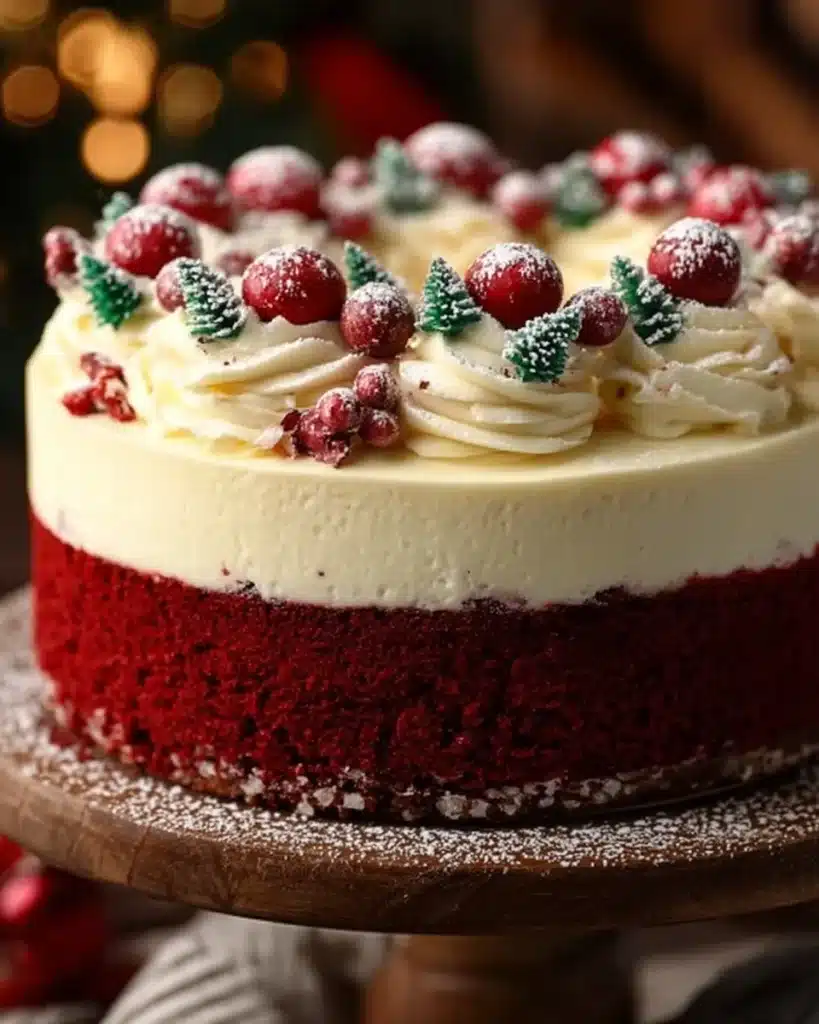
Table of Contents
Ingredients
Creating this Christmas Red Velvet cheesecake requires three parts: the cake layers, cheesecake center, and fluffy frosting. Each part adds to the flavor and texture, making this Christmas Red Velvet recipe a stunning holiday dessert.
For the Red Velvet Cake Layers
- 2 1/2 cups all-purpose flour
- 2 tbsp unsweetened cocoa powder
- 1 tsp baking powder
- 1 tsp baking soda
- 1/2 tsp salt
- 1 3/4 cups granulated sugar
- 3/4 cup vegetable oil
- 1 cup buttermilk (room temperature)
- 2 large eggs
- 1–2 tbsp red food coloring (gel or liquid)
- 1 tsp vanilla extract
- 1 tsp white vinegar
For the Cheesecake Layer
- 16 oz cream cheese (softened)
- 1/2 cup granulated sugar
- 1/2 cup sour cream
- 2 large eggs
- 1 tsp vanilla extract
For the Cream Cheese Frosting
- 8 oz cream cheese (softened)
- 1/2 cup unsalted butter (softened)
- 3 cups powdered sugar
- 1 tsp vanilla extract
Equipment Needed
You’ll need a few tools for this recipe. A 9-inch springform pan is essential for the cheesecake layer, along with two 9-inch round cake pans for the velvet layers. Mixing bowls, a stand or hand mixer, parchment paper, and an offset spatula keep things smooth. A serrated knife helps trim cakes for neat stacking. With these basics, you’ll be ready to whip up bakery-worthy layers in your own kitchen.
Step-by-Step Instructions for Christmas Red Velvet Cheesecake
Make the Cheesecake Layer
Start by preheating the oven to 325°F (165°C). Grease a 9-inch springform pan and line the bottom with parchment. Beat softened cream cheese with sugar until silky. Add sour cream and vanilla, then mix in eggs one by one on low speed. Pour the batter into the pan and bake for 40–45 minutes. The center should be set but slightly jiggly. Cool completely, then chill for at least 4 hours or overnight.
Prepare the Red Velvet Cake Layers
Preheat the oven to 350°F (175°C). Grease and line two 9-inch round pans with parchment. In one bowl, whisk flour, cocoa, baking powder, baking soda, and salt. In another, beat sugar and oil together. Add eggs one at a time, then mix in vanilla, food coloring, and vinegar. Alternate adding the dry ingredients with buttermilk, starting and ending with dry. Divide the batter evenly between pans and bake 25–30 minutes. Cool for 10 minutes, then transfer to wire racks to cool fully.
Whip the Cream Cheese Frosting
Beat softened cream cheese and butter until fluffy. Gradually add powdered sugar, mixing until smooth and creamy. Stir in vanilla for that classic flavor. For an extra light texture, beat for a few minutes longer until airy.
Assemble the Cake

Place one red velvet layer on a serving plate. Spread frosting over the top, then carefully set the cheesecake layer on it. Spread more frosting on top of the cheesecake, then add the second red velvet layer. Cover the top and sides with frosting, smoothing with an offset spatula. Trim cake edges with a serrated knife for an even finish if needed.
Chill Before Serving
Once frosted, chill the cake for at least 1 hour. This sets the layers, locks in moisture, and makes cutting cleaner. Serve chilled for the best texture and flavor.
Expert Tips for Success
Always bring ingredients to room temperature before mixing. This ensures smooth batters and avoids lumps. Chill the cheesecake overnight for easy handling when layering. Trim cake tops with a serrated knife so the stack is level. For bold color, use gel food coloring, which won’t thin out the batter. Finally, choose a high-quality cocoa powder, as its flavor truly shines against the tangy cream cheese.
Variations to Try
Add a chocolate ganache drizzle between layers for extra richness. Try peppermint extract in the frosting for a festive twist. Swap the flour for a gluten-free blend to make it accessible to all guests. Holiday sprinkles or crushed candy canes on top add cheerful sparkle. Each variation keeps the spirit of Christmas while giving a playful spin to the classic.
Serving Suggestions
Serve this Christmas Red Velvet cheesecake on a decorated cake stand for maximum holiday flair. Pair each slice with hot cocoa, spiced chai, eggnog, or a glass of port for adults. For even more presentation inspiration, you can check cozy holiday dessert ideas on Pinterest. This Christmas Red Velvet dessert makes a dazzling centerpiece for Christmas dinner, especially alongside savory dishes like creamy scalloped potatoes for Christmas dinner. With its red and white layers, it will shine on any holiday dessert table.
Storage and Freezing Instructions
Keep leftovers covered in the refrigerator for up to 5 days. The flavors stay fresh, and the frosting holds its creamy texture. For longer storage, slice the cake and wrap pieces in plastic, then foil. Freeze for up to 2 months. Thaw slices overnight in the fridge before serving. This way, you can enjoy holiday cheer long after Christmas.
Related Recipes to Try
- Festive Christmas pavlova trifle
- Peppermint swirl fudge for the holidays
- Frosted Christmas brownies
- Classic gingerbread cookies recipe
- Christmas sugar cookie cheesecake
Frequently Asked Questions
What are some fun facts about red velvet cake?
It became popular in the 1920s and is known for its striking color. Traditionally, the acidity of buttermilk and vinegar helped enhance the red hue of cocoa.
Is red velvet a Christmas flavor?
Yes, many associate its bold red color and cream cheese frosting with the holidays, making it a seasonal favorite.
What’s unique about red velvet?
It balances a mild cocoa flavor with tangy buttermilk and cream cheese frosting. Its texture is tender and moist, unlike standard chocolate cake.
Do you have to refrigerate red velvet?
Yes, because of the cream cheese frosting and cheesecake layer, always store it in the fridge to keep it fresh and safe.
Conclusion
Christmas Red Velvet cheesecake is more than just dessert, it’s the ultimate holiday showpiece. With its creamy cheesecake heart, fluffy frosting, and rich red velvet layers, this Christmas Red Velvet recipe is worth every step. For more festive inspiration and holiday food styling ideas, visit our Pinterest collection. It brings joy to Christmas gatherings and makes the season feel extra special. Share it with loved ones and watch their faces light up with delight.
Print
Christmas Red Velvet Cheesecake: The Ultimate Holiday Dessert
- Total Time: 7 hours
- Yield: 12 slices 1x
- Diet: Vegetarian
Description
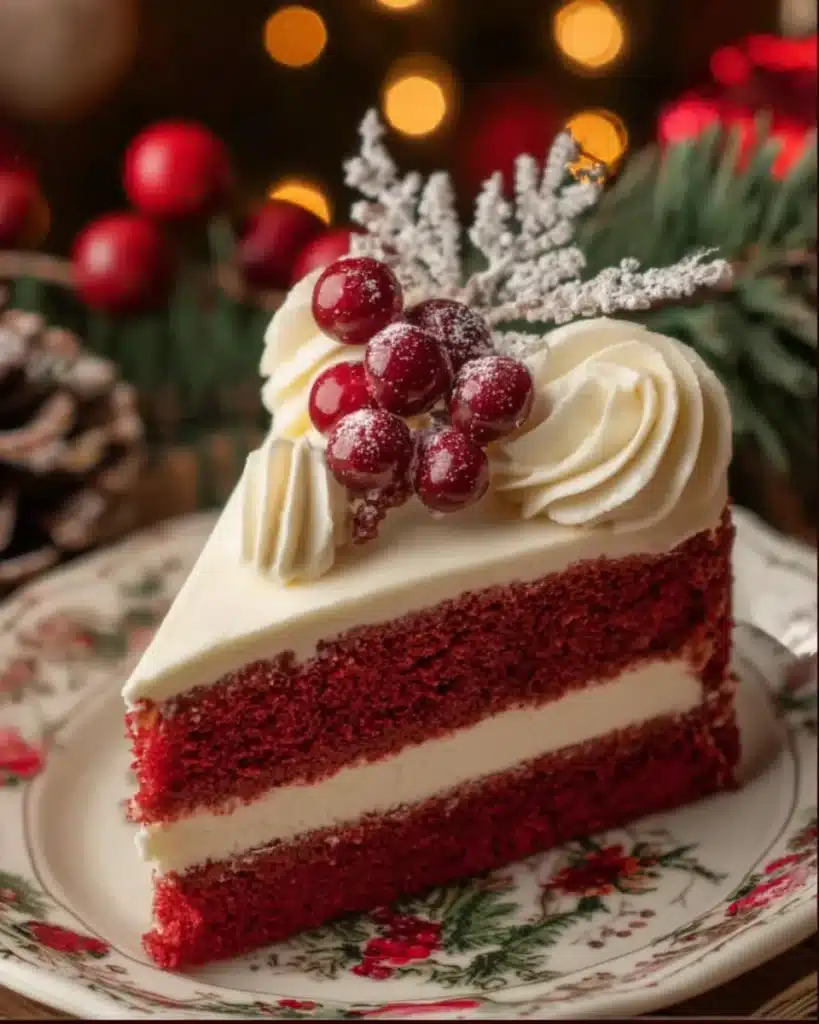
Christmas Red Velvet cheesecake stacks tangy cheesecake between moist red velvet layers with fluffy cream cheese frosting. Striking, festive, and make-ahead friendly for holiday gatherings.
Ingredients
[Red Velvet Cake Layers]
2 1/2 cups all-purpose flour
2 tbsp unsweetened cocoa powder
1 tsp baking powder
1 tsp baking soda
1/2 tsp salt
1 3/4 cups granulated sugar
3/4 cup vegetable oil
1 cup buttermilk (room temperature)
2 large eggs
1–2 tbsp red food coloring (gel or liquid)
1 tsp vanilla extract
1 tsp white vinegar
[Cheesecake Layer]
16 oz cream cheese (softened)
1/2 cup granulated sugar
1/2 cup sour cream
2 large eggs
1 tsp vanilla extract
[Cream Cheese Frosting]
8 oz cream cheese (softened)
1/2 cup unsalted butter (softened)
3 cups powdered sugar
1 tsp vanilla extract
Instructions
1. Make the cheesecake layer: Preheat oven to 325°F. Grease a 9 inch springform pan and line the bottom with parchment.
2. Beat softened cream cheese and sugar until smooth. Mix in sour cream and vanilla, then add eggs one at a time on low speed.
3. Pour into the pan and bake 40 to 45 minutes until set at the edges but slightly jiggly in the center.
4. Cool completely, then refrigerate at least 4 hours or overnight.
5. Prepare the cake layers: Preheat oven to 350°F. Grease and line two 9 inch round cake pans with parchment.
6. Whisk flour, cocoa, baking powder, baking soda, and salt in a bowl.
7. In another bowl beat sugar and oil. Add eggs one at a time, then mix in vanilla, food coloring, and vinegar.
8. Alternate adding dry ingredients with buttermilk, beginning and ending with dry. Mix just until combined.
9. Divide batter between pans and bake 25 to 30 minutes. Cool 10 minutes in pans, then turn out to racks to cool completely.
10. Make the frosting: Beat cream cheese and butter until creamy. Gradually add powdered sugar until smooth. Beat in vanilla.
11. Assemble: Level cake layers if needed. Place one red velvet layer on a plate and spread frosting on top.
12. Add the chilled cheesecake layer, spread more frosting, then top with the second red velvet layer.
13. Frost the top and sides smoothly. Decorate with sprinkles, crumbs, or candy canes as desired.
14. Chill before serving: Refrigerate the finished cake at least 1 hour for clean slices and the best texture.
Notes
Allow all ingredients to reach room temperature before mixing.
Chill the cheesecake overnight for easier handling.
Trim cake layers with a serrated knife for an even finish.
Use gel food coloring for vivid color without thinning the batter.
High quality cocoa improves flavor.
- Prep Time: 25 minutes
- Cook Time: 50 minutes
- Category: Christmas Dessert Recipes
- Method: Baking
- Cuisine: American
Nutrition
- Serving Size: 1 slice
- Calories: 470
- Sugar: 41g
- Fat: 25g
- Carbohydrates: 56g
- Protein: 6g