Garlic bread rolls are the ultimate Thanksgiving side dish with their golden crust, soft fluffy center, and rich buttery garlic finish. Each roll bakes up pillowy and warm, perfect for soaking up gravy or pairing with turkey. The garlic butter brushed over the top adds irresistible aroma and flavor. While they take some rise time, the steps are simple, and the results are well worth it. Set aside about three and a half hours from start to finish, and you’ll be rewarded with 12 tender rolls that your family will fight over. These homemade garlic bread rolls promise comfort, holiday cheer, and that cozy smell of fresh bread wafting through your kitchen.
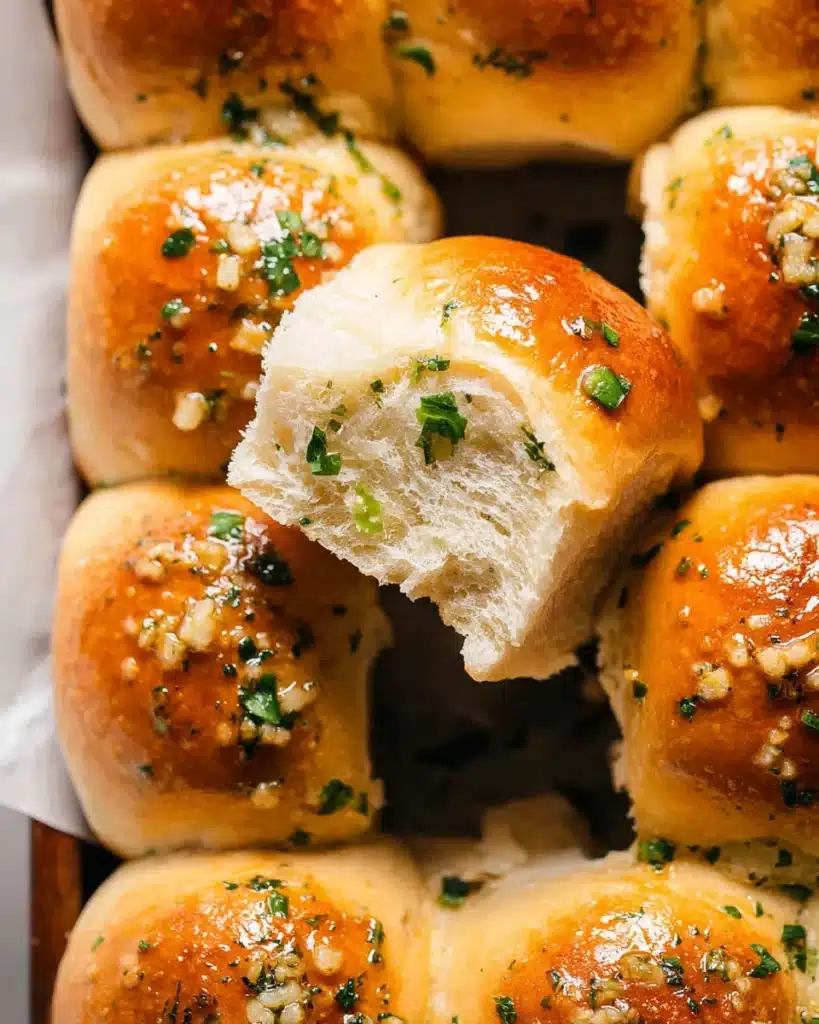
Table of Contents
Why You’ll Love This Recipe
You’ll love these garlic bread rolls because they’re everything you want in a dinner roll: soft, fluffy, and brushed with savory garlic butter. The flavor is rich but balanced, making them a crowd-pleasing favorite at any gathering. They can be made ahead, stored, or even frozen, so you don’t have to stress on Thanksgiving day. Plus, they pair beautifully with other festive dishes like garlic mashed potatoes or slow cooker garlic herb pot roast. Whether it’s Thanksgiving or just a cozy weeknight meal, these rolls bring a homemade touch that feels extra special.
Ingredients You’ll Need
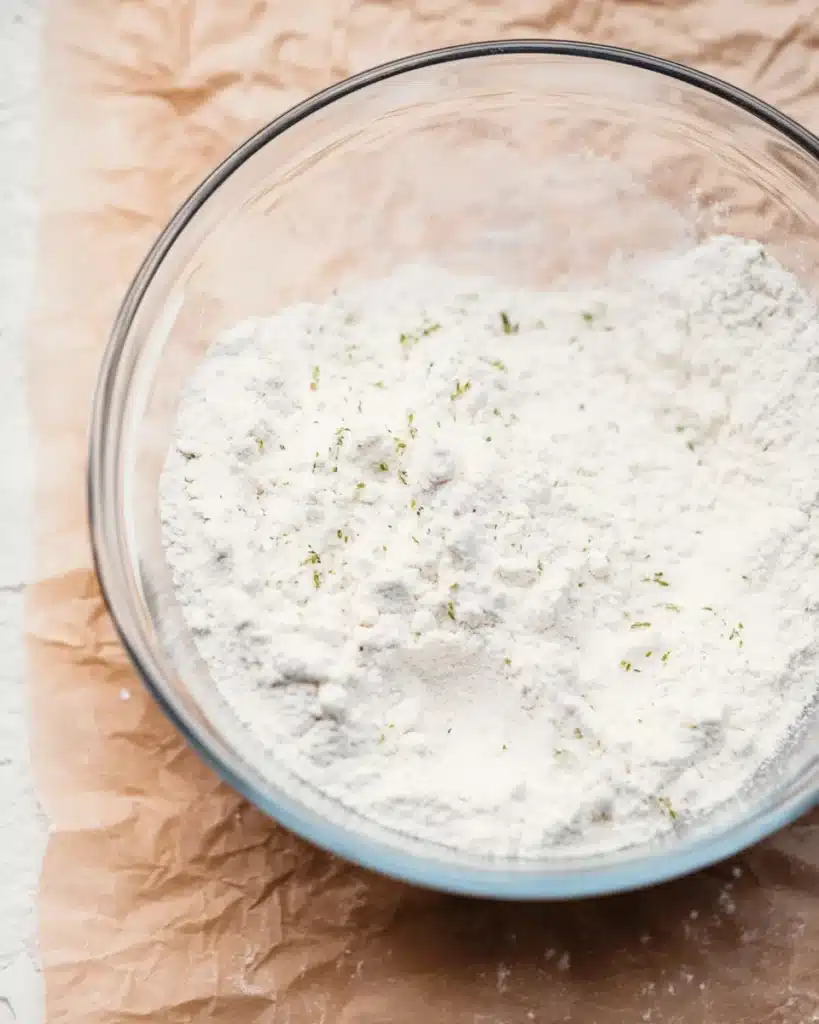
To make the base dough, you’ll need 1 cup of warm milk (between 100–110°F) to activate the yeast properly. Add 2 1/4 teaspoons of instant yeast and 2 tablespoons of granulated sugar, which helps feed the yeast and aids rising. For structure, use 3 cups (360g) of all-purpose flour measured with a kitchen scale for accuracy. One teaspoon of salt adds balance, while 1/4 cup softened unsalted butter brings tenderness. Finally, a large egg enriches the dough with extra softness.
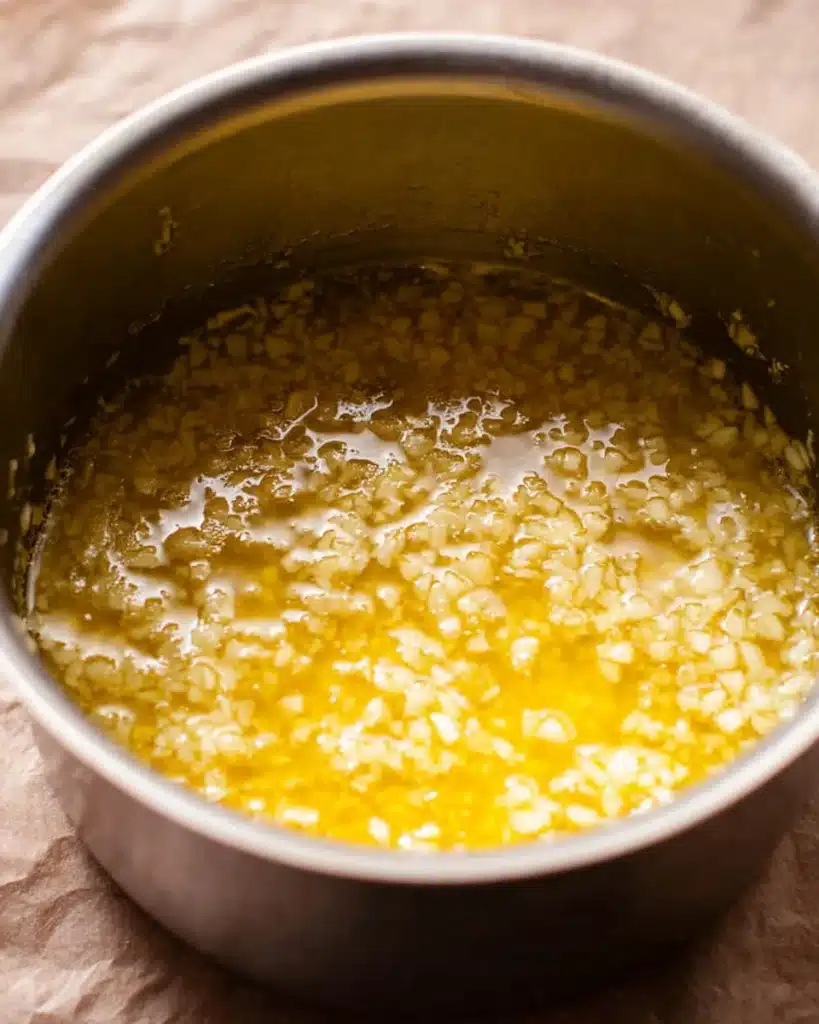
For the garlic butter topping, melt 1/4 cup unsalted butter and stir in 3 minced garlic cloves for bold flavor. Add 1/2 teaspoon of salt to enhance the taste, then finish with 1 tablespoon of freshly chopped parsley for a bright, herbal note. Fresh parsley really shines here, though dried can be substituted if needed. Together, these simple ingredients create rolls with a soft base and flavorful topping that feels homemade yet elegant.
Step-by-Step Instructions
Step 1: Mix the Dough
In a large bowl, stir together warm milk, yeast, and sugar. Let this sit for 5–10 minutes until foamy, showing the yeast is alive. Then add flour, salt, softened butter, and egg. Knead until smooth and elastic, about 8–10 minutes by hand or 5 minutes with a mixer. The dough should be soft but not sticky.
Step 2: First Rise
Place the dough in a greased bowl and cover with a towel.
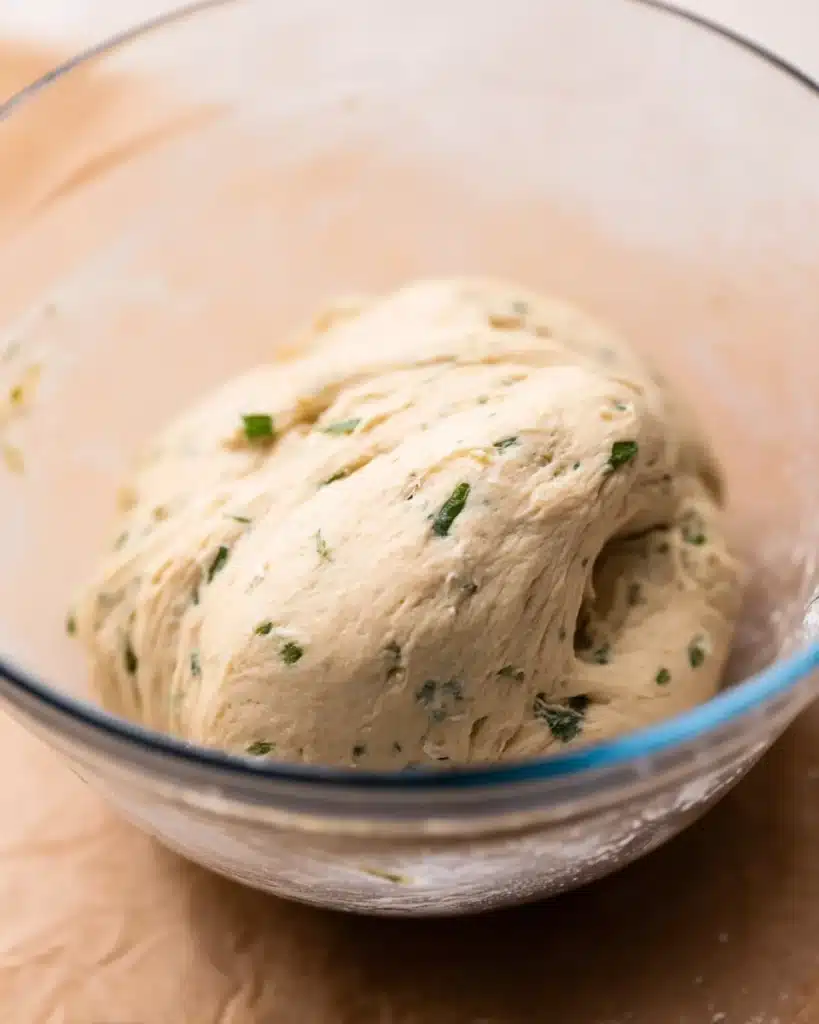
Set it in a warm spot and let it rise until doubled, about 1 hour. The dough should feel airy and puffed up when ready.
Step 3: Shape the Rolls
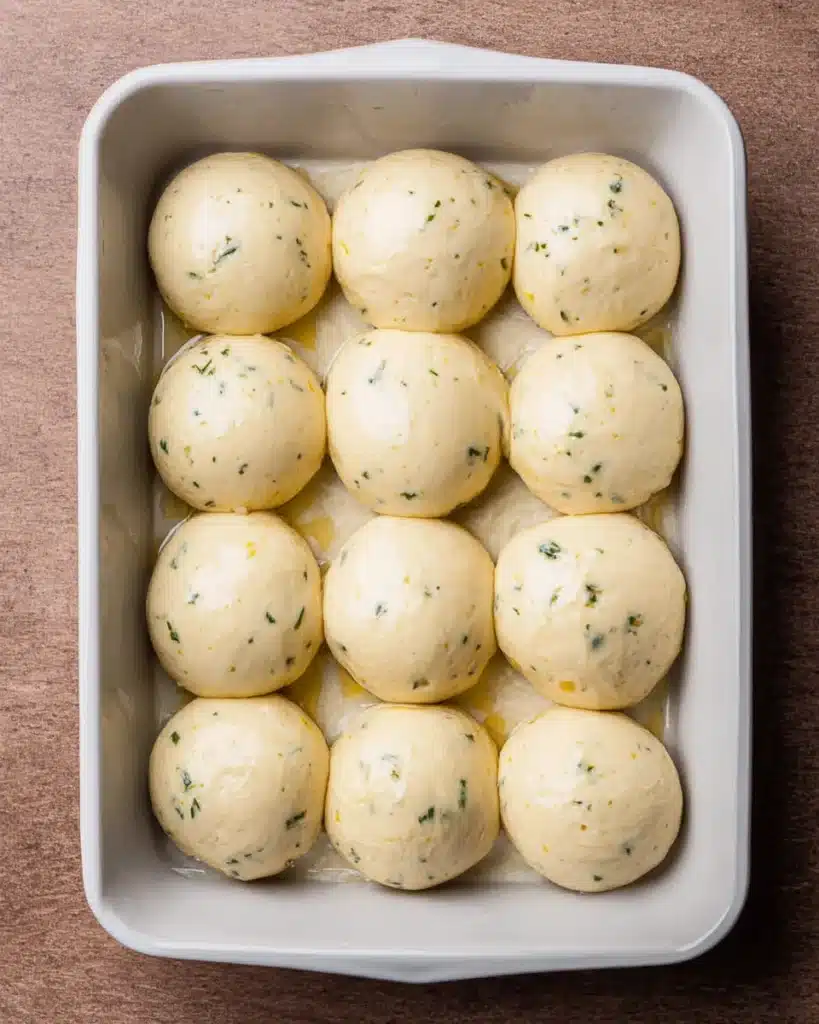
Punch down the risen dough and divide it into 12 equal pieces. Roll each piece into a ball by tucking the edges underneath until smooth. Arrange the rolls in a greased baking dish, leaving a little space between them.
Step 4: Second Rise
Cover the shaped rolls and let them rise again in a warm place until puffy, about 30–45 minutes. They should nearly double in size and feel light when touched gently.
Step 5: Bake
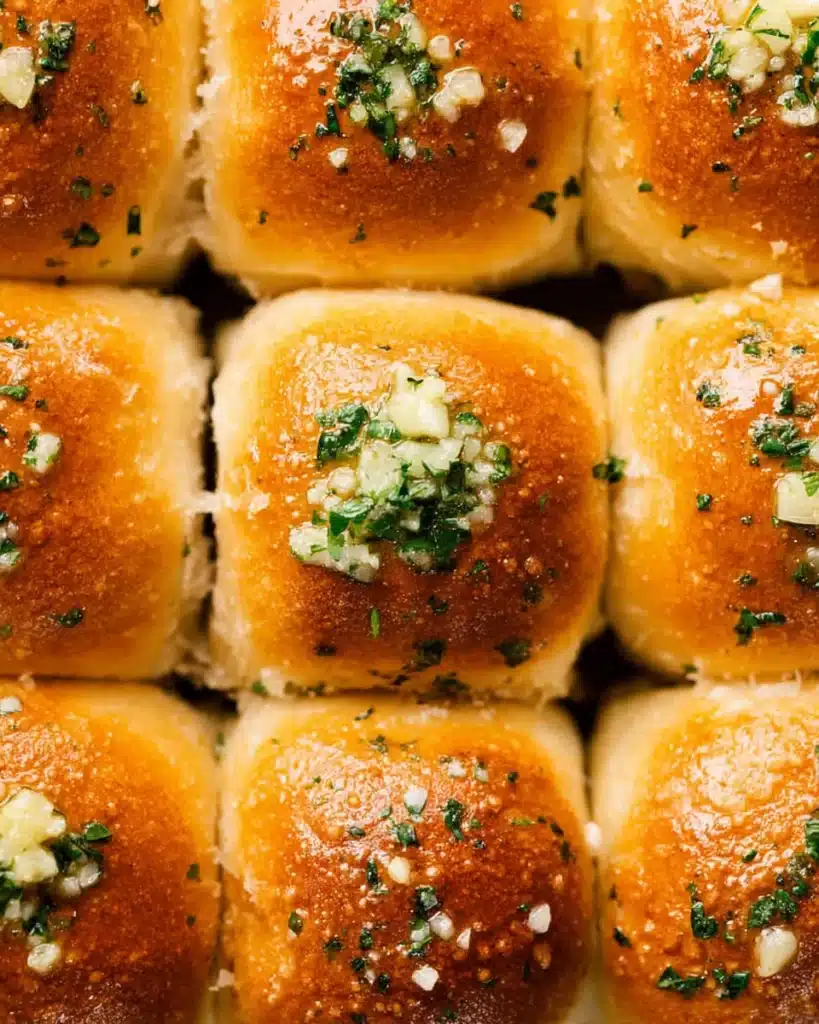
Preheat your oven to 350°F. Bake the rolls for 20–23 minutes until golden brown on top. The bottoms should sound hollow when tapped, another sign they’re done.
Step 6: Garlic Butter Finish
While the rolls bake, melt butter in a small pan. Stir in garlic and salt, cooking just until fragrant. Remove from heat and mix in parsley. Brush this garlic butter generously over the warm rolls right after baking for maximum flavor.
Recipe Notes and Tips for Success
Always measure flour with a scale for accuracy, as too much can make the dough heavy. Knead thoroughly until the dough passes the “windowpane test,” meaning it stretches thin without tearing. If your kitchen is cool, let the dough rise in a slightly warmed oven with the light on for consistent results. Be patient with rising, since under-proofed rolls won’t turn out fluffy. Adjust bake time slightly depending on your oven; rolls should be golden but not dry. For variations, add shredded cheese to the dough or sprinkle Parmesan on top after brushing with garlic butter. With these tips, you’ll get consistently soft and flavorful garlic bread rolls every time.
Storage, Freezing, and Make-Ahead Options
These garlic bread rolls store well in an airtight container at room temperature for 2 days or in the fridge for up to 1 week. To freeze baked rolls, let them cool completely, wrap tightly, and freeze for up to 2 months. Thaw at room temperature, then reheat in the oven until warm. For unbaked rolls, freeze them right after shaping. When ready to use, thaw overnight in the fridge, let rise until puffy, then bake as directed. You can also shape the rolls ahead of time, refrigerate overnight, and bake the next day after bringing them to room temperature. These flexible options make it easy to enjoy homemade bread without last-minute stress on Thanksgiving.
Related Recipes to try
- creamy garlic parmesan chicken pasta
- garlic mashed potatoes recipe for Thanksgiving
- cheesy scalloped potatoes for Christmas dinner
- slow cooker garlic herb pot roast
- balsamic glazed brussels sprouts
- crescent roll apple turnovers
Conclusion
Garlic bread rolls are more than just a side dish; they’re the kind of warm, comforting bread that makes a Thanksgiving table feel complete. With their fluffy centers, golden tops, and buttery garlic finish, they’re guaranteed to disappear fast. Best of all, they’re freezer-friendly and simple to prep ahead, making them practical for busy holiday cooking. Pair them with roasted meats, creamy sides, or even a comforting bowl of pasta. Whether you serve them for Thanksgiving, Christmas, or a weeknight dinner, these rolls bring homemade goodness to the table. Try them once and you’ll want to make them part of your holiday traditions. For more holiday inspiration, check out our Pinterest page at Cozy Recipes by Clara.
Print
Garlic Bread Rolls
- Total Time: 3 hours 30 minutes
- Yield: 12 rolls 1x
- Diet: Vegetarian
Description
Soft, fluffy garlic bread rolls brushed with buttery garlic topping, perfect for Thanksgiving or holiday dinners.
Ingredients
1 cup warm milk (100–110°F)
2 1/4 tsp instant yeast
2 tbsp granulated sugar
3 cups (360g) all-purpose flour
1 tsp salt
1/4 cup unsalted butter, softened
1 large egg
For garlic butter: 1/4 cup unsalted butter, 3 minced garlic cloves, 1/2 tsp salt, 1 tbsp chopped parsley
Instructions
1. Mix warm milk, yeast, and sugar; let sit until foamy.
2. Add flour, salt, butter, and egg; knead until smooth.
3. Let rise in a warm place until doubled, about 1 hour.
4. Divide dough into 12 pieces, shape into rolls, and place in a greased pan.
5. Let rise again until puffy, about 30–45 minutes.
6. Bake at 350°F for 20–23 minutes until golden.
7. Melt butter with garlic and salt, stir in parsley, then brush over warm rolls.
Notes
Use a kitchen scale for accurate flour measurement.
Rolls can be frozen baked or unbaked.
If freezing unbaked, freeze after shaping; thaw and proof before baking.
You can make ahead by refrigerating overnight after shaping. Bring to room temperature and bake next day.
- Prep Time: 1 hour
- Cook Time: 20–23 minutes
- Category: Thanksgiving
- Method: Baking
- Cuisine: American
Nutrition
- Serving Size: 1 roll
- Calories: 193
- Sugar: 2g
- Sodium: 190mg
- Fat: 7g
- Saturated Fat: 4g
- Unsaturated Fat: 2g
- Trans Fat: 0g
- Carbohydrates: 26g
- Fiber: 1g
- Protein: 4g
- Cholesterol: 25mg