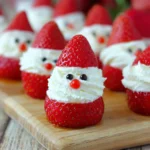
Who can resist these Strawberry Santas? Sweet, creamy, and ready in minutes, they’re a playful twist on festive treats. Perfect for Christmas parties, kids’ snacks, or quick dessert platters. Plus, they’re healthy, bite-sized, and impossibly adorable.
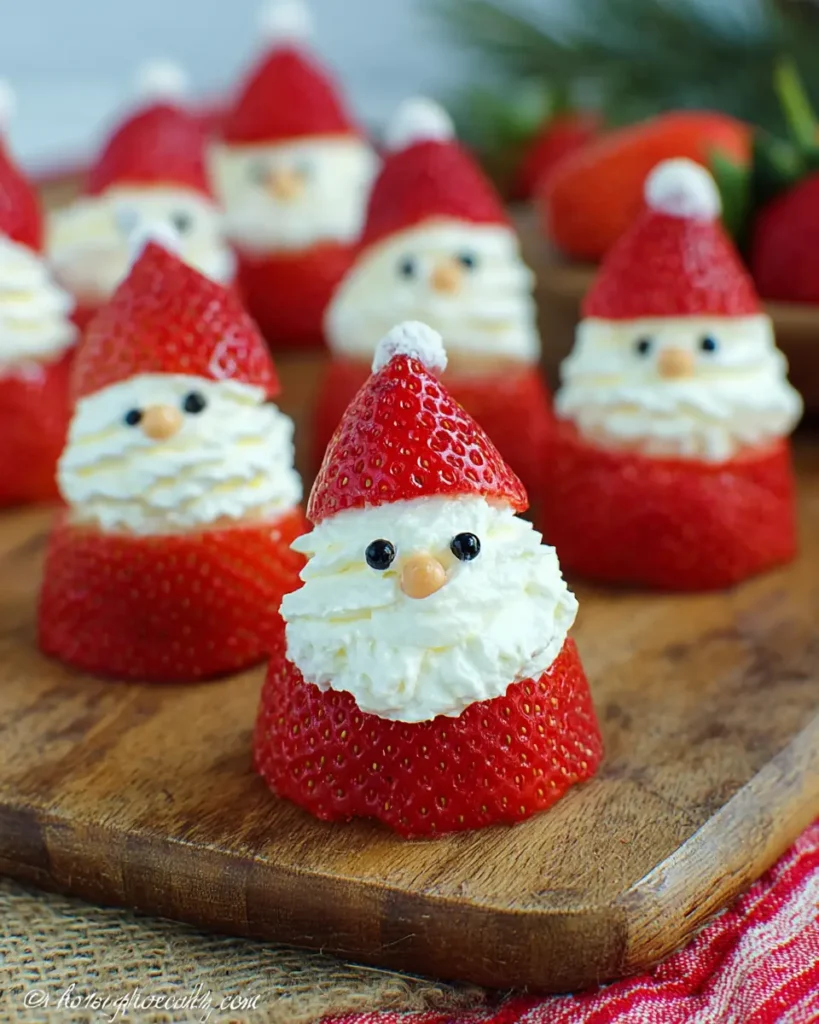
Table of Contents
Why You’ll Love These Strawberry Santas
These Strawberry Santas are the ultimate last-minute holiday dessert. You only need five simple ingredients, and there’s zero baking involved. They’re made with juicy strawberries, a light cream cheese filling, and tiny icing faces that bring instant smiles. Each one has under 50 calories, making them guilt-free and fun for kids or adults alike. You can make a dozen in just fifteen minutes, and they’re easy enough for little helpers to join in. They’re the kind of treat that instantly brightens a holiday table without effort, turning an ordinary dessert spread into something truly festive and memorable.
Ingredients You’ll Need
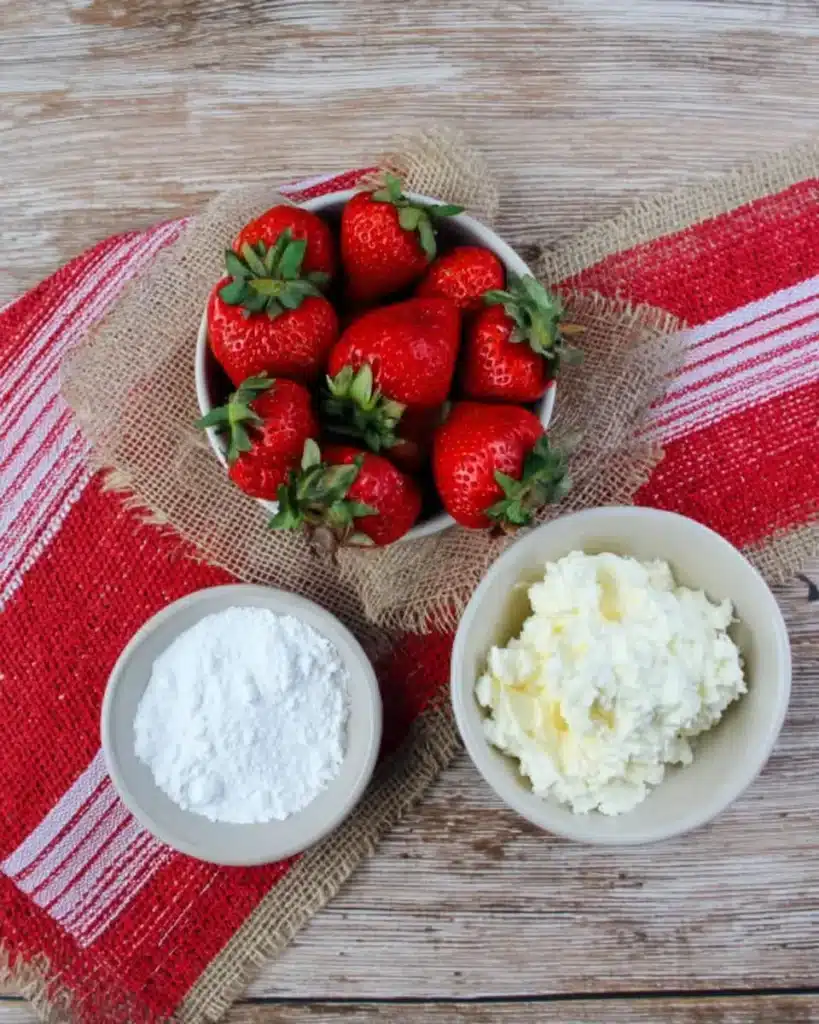
For these Strawberry Santas, you’ll only need a few everyday ingredients. Fresh, ripe strawberries work best for flavor and shape. Whipped cream cheese adds creaminess, while powdered sugar brings a hint of sweetness. Vanilla extract gives warmth and balance, and decorative icing helps create the Santa faces. You can also try Greek yogurt or vegan cream cheese if you prefer dairy-free options. For a fun twist, use chocolate chips or tiny sprinkles for eyes. Each ingredient works together to make these little Santas come to life—simple, sweet, and perfectly merry.
Ingredients List:
- 12 large strawberries
- 1 cup whipped cream cheese
- 2 tablespoons powdered sugar
- ¼ teaspoon vanilla extract
- Red and black decorative icing for faces
How to Make Strawberry Santas
Step 1 – Prepare the Strawberries
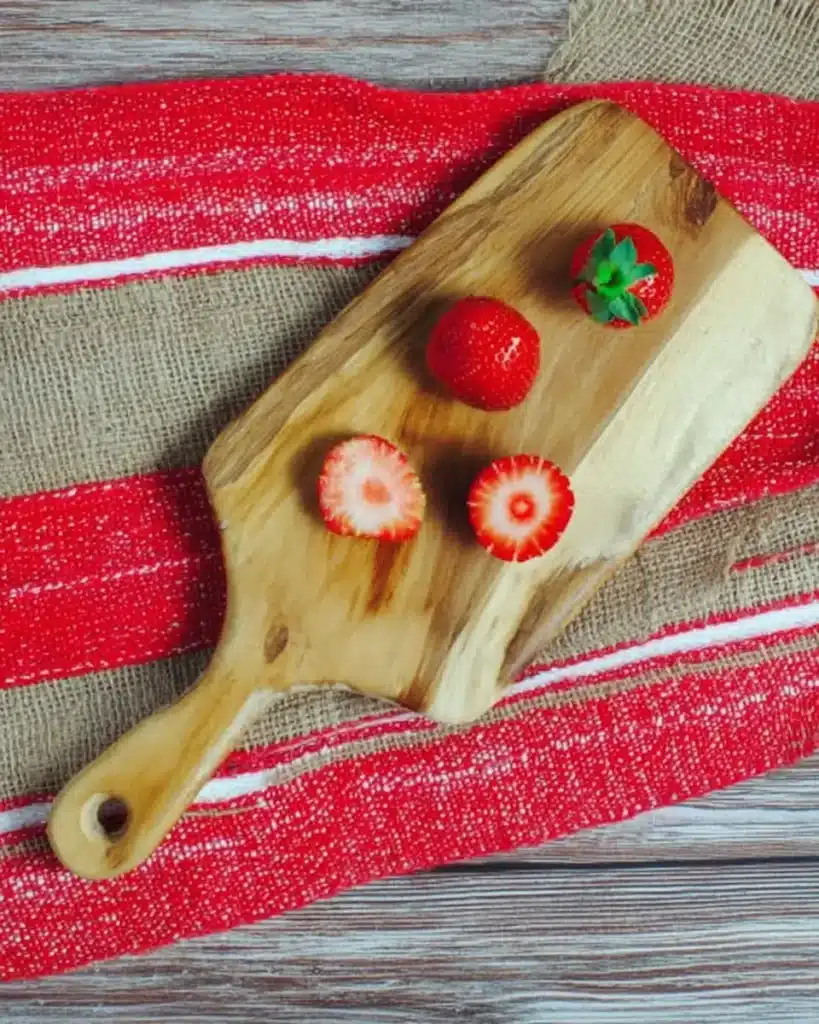
Start by washing and drying your strawberries well. Moisture makes the filling slip, so take a minute to pat them completely dry. Slice off the green stem end to create a flat base so each strawberry can stand upright. Then, cut across the top third to make the “hat.” It helps to use firm, ripe berries—soft ones won’t hold shape. Try to keep your cuts even for easier assembly later. If a strawberry tilts, trim the base slightly. Taking care at this step ensures your Strawberry Santas look neat and stand tall on your dessert tray.
Step 2 – Make the Cheesecake Filling

In a small bowl, mix whipped cream cheese, powdered sugar, and vanilla extract until smooth and creamy. Use a spoon or whisk—whatever’s handy. Once the mixture is soft and fluffy, transfer it into a piping bag fitted with a star tip. Don’t have one? No worries! Just fill a resealable bag and snip one corner. This mixture becomes the “Santa beard” and coat trim. Taste it before piping; you can adjust sweetness by adding a touch more sugar or a drop of vanilla. Keep it chilled if your kitchen’s warm, so the filling stays firm while assembling.
Step 3 – Assemble the Santas
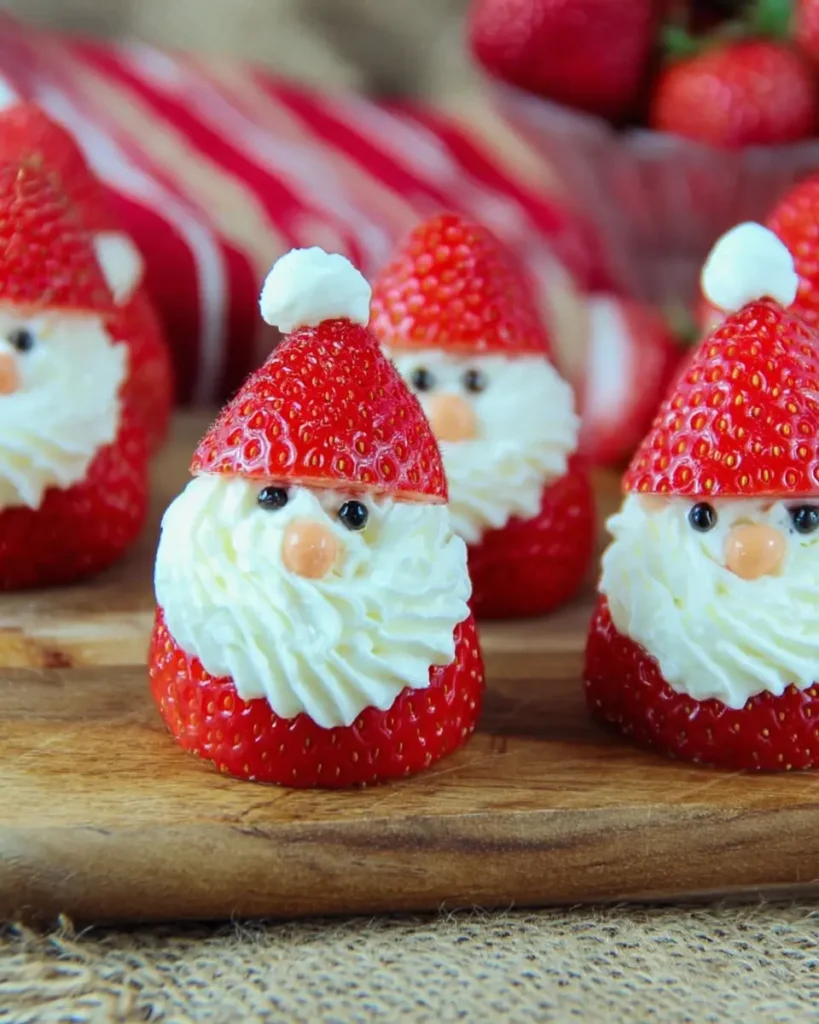
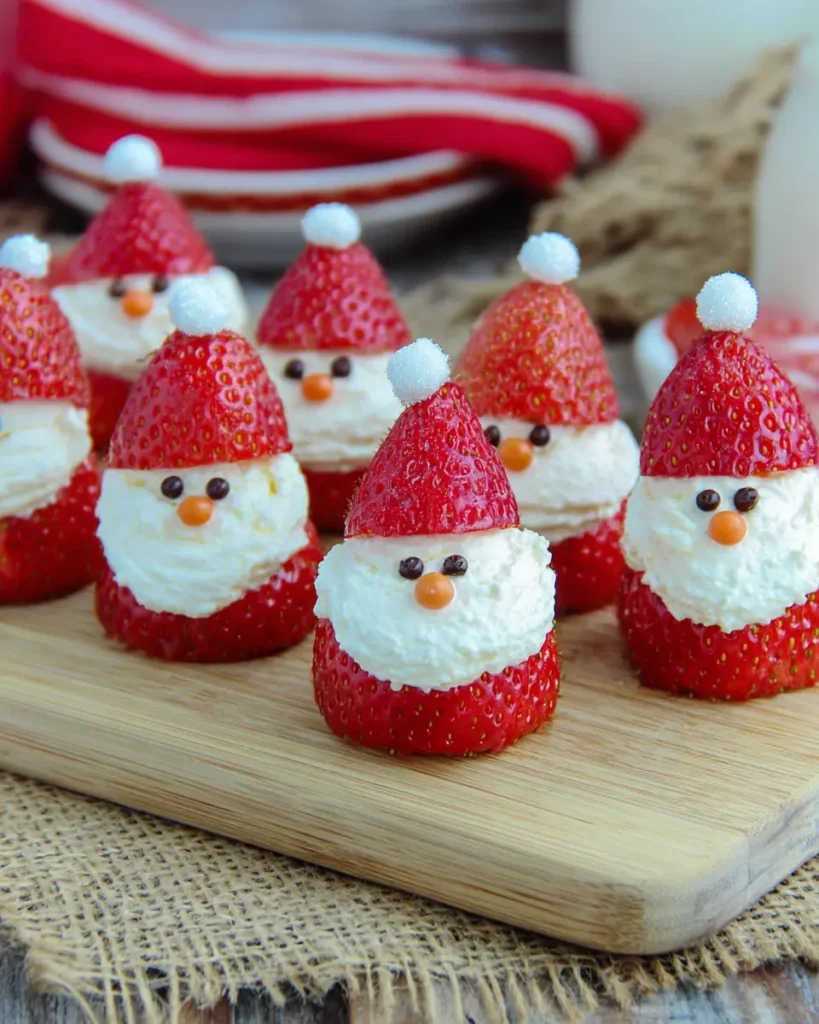
Now the fun part! Pipe a generous swirl of cream filling onto each strawberry base—this forms Santa’s beard and body. Gently place the top piece back on to create the hat. Add a tiny dollop on the tip of each hat for the pom-pom. Then, use decorative icing or melted chocolate to draw two small eyes and a dot for the nose. Chocolate chips, raisins, or sprinkles also work. Work quickly but carefully, as strawberries can soften if left out too long. In fact, if you’re making these with kids, this step will be their favorite part!
Step 4 – Serve or Store
Serve your Strawberry Santas immediately for the freshest taste. They look adorable lined up on a white plate or dessert board. If you need to make them ahead, store them in an airtight container in the refrigerator for up to two days. Keep in mind that strawberries tend to release moisture over time, so they’ll taste best the same day. Avoid freezing—frozen strawberries lose their shape and texture. When ready to serve, let them sit for five minutes at room temperature for that perfect bite of creamy sweetness.
Recipe Notes and Tips
Always use fresh, firm strawberries—frozen ones are too soft. Dry them completely before filling to prevent slipping. If your cream cheese mixture feels too stiff, add a teaspoon of milk or yogurt to loosen it. For extra precision, chill the strawberries for ten minutes before piping. It helps keep the filling firm. You can also stand each Santa in a mini cupcake liner for easy serving and transport. Want to make them sweeter? Add a touch of honey or maple syrup to the filling. For neat piping, hold your bag upright and apply steady pressure.
Variations and Creative Twists
You can easily customize these Strawberry Santas to match your taste or dietary needs. Use Greek yogurt instead of cream cheese for a lighter, tangier option. Or try ricotta for a rich, cannoli-style flavor. Vegan cream cheese works perfectly for a dairy-free version too. If you want extra texture, sprinkle crushed nuts or shredded coconut over the cream. You can even swap strawberries with banana slices for a playful twist. For decoration, use tiny candies, colored sugar, or mini chocolate chips. Each variation keeps the same charm but adds a new festive flavor combination.
Frequently Asked Questions
What are 5 interesting facts about strawberries?
Strawberries are the only fruit with seeds on the outside—around 200 per berry! They belong to the rose family, and ancient Romans loved them for healing. California grows most of the world’s strawberries, and they’re packed with vitamin C.
How do you make strawberry Santas?
Simply slice strawberries into two parts, fill with a sweet cream mixture, and decorate with icing to form tiny Santas. It takes just 15 minutes!
What happens if you don’t cover strawberries for winter?
In gardens, uncovered strawberry plants can freeze or dry out during cold months. Mulching helps protect roots until spring.
How did strawberry get its name?
It likely comes from old English “streawberige,” meaning “strewn berry,” because plants spread runners across the ground like straw.
Related Recipes to Try
- Festive Christmas tree cupcakes for kids
- Homemade peppermint pie holiday dessert
- Adorable snowmen truffles vegan recipe
- Classic Christmas yule log cake
- Easy Christmas cookie lasagna
- Festive chocolate bites for the holidays
Conclusion / Final Thoughts
These Strawberry Santas aren’t just desserts—they’re tiny edible smiles that brighten any Christmas table. They’re quick, cute, and guaranteed to bring joy to kids and adults alike. Whether you make them for a school party, family brunch, or cozy night in, they’re a fun reminder that the best holiday treats can be simple. So grab your strawberries, whip up that filling, and start piping. Your kitchen’s about to smell sweet and cheerful! Don’t forget to share your creations and get inspired with more festive ideas on Pinterest.
Strawberry Santas – The Cutest No-Bake Christmas Dessert
- Total Time: 15 minutes
- Yield: 12 Strawberry Santas 1x
Description
Cute, creamy, and festive Strawberry Santas made from fresh strawberries, sweet cream cheese, and icing faces. The easiest no-bake Christmas dessert ready in 15 minutes!
Ingredients
12 large strawberries
1 cup whipped cream cheese
2 tablespoons powdered sugar
¼ teaspoon vanilla extract
Red and black decorative icing for faces
Instructions
1. Wash and dry strawberries thoroughly.
2. Slice off stems to create a flat base, then cut each strawberry into two parts: a base and a pointed top for the Santa hat.
3. In a small bowl, combine whipped cream cheese, powdered sugar, and vanilla until smooth.
4. Transfer filling to a piping bag with a star tip or use a resealable bag with the corner cut off.
5. Pipe a tall swirl of filling onto each strawberry base.
6. Place the top piece on to form a hat, then pipe a small dollop on top as the pom-pom.
7. Use decorative icing to add eyes and a nose.
8. Serve immediately or refrigerate until ready to enjoy.
Notes
Best consumed the same day. Can be stored in an airtight container in the fridge for up to 2 days, but texture and taste may decline.
Do not freeze. Use fresh strawberries only; frozen ones are too soft.
- Prep Time: 15 minutes
- Cook Time: 0 minutes
- Category: Dessert, Snack
- Method: No-Bake
- Cuisine: American
Nutrition
- Serving Size: 1 Santa
- Calories: 49
- Sugar: 3g
- Sodium: 72mg
- Fat: 3g
- Saturated Fat: 2g
- Unsaturated Fat: 1.1g
- Trans Fat: 0g
- Carbohydrates: 4g
- Fiber: 0.2g
- Protein: 2g
- Cholesterol: 11mg